I never dreamed of solo travel—never really considered it—until my best friend suggested I might enjoy certain aspects of it. I didn’t even understand the concept of a hostel or how one could safely travel to new places alone. Little did I know, that concept would change my life forever.
Solo travel, and travel in general, is an incredible experience. There’s nothing like having only yourself to rely on. You could have all the backup plans in the world, but at the end of the day, you’re the one responsible for your entertainment, nourishment, and safety. It’s a beautiful lesson—one that I’ve had the privilege of learning over and over again. Each new trip teaches me something different, something innate about myself and what I truly want.
That being said, I did my research before embarking on these journeys. With every trip, I continue to learn more about how to stay safe (with some mistakes made along the way). Below are my top tips, tricks, and stories on staying safe while traveling—particularly from my perspective as a solo woman of color traveler.
Tip: Do Your Research (Duh)

Americans have a reputation—sometimes unfair, sometimes earned—for showing up in new places without doing the proper research. When I say research, I don’t mean writing a thesis, but taking the time to understand the basics out of respect for the community you’re visiting and for your own safety.
For me, this is one of the most exciting parts of travel! I love learning, so I dive deep into reading about the places I’m visiting. However, the key things I always research beforehand include:
- Local currency and exchange rates
- Basic language phrases (learn how to say hello and thank you!)
- Recent news (e.g., Are there protests due to political issues?)
- Health requirements (vaccines, medical advisories, disease outbreaks, and whether I need to check in with my doctor due to my own health conditions)
- Local food scene (especially if you have a dietary restriction like I do)
- Neighborhood insights (where I’m staying and navigation routes from airports or train stations)
Some travelers may prefer to “figure it out in the moment,” but I find that being informed makes me more comfortable, more adventurous, and more open to opportunities. Researching helps me say yes to more spontaneous experiences because I already have a sense of how things work.
If you want to take it a step further, I highly recommend finding locals on Instagram or TikTok to get insights from their perspective. But rest assured, you can be safe and still leave room for adventure, even with a little preparation.
Tip: Save the Locations of Key Essentials

This goes hand in hand with research—it’s vital to know the locations of:
- Your country’s embassy
- The nearest hospital
- Local law enforcement
- Emergency services number (e.g., the country’s version of 911)
You may think nothing will happen, but you never know. It takes only a few minutes to save this info in your phone, and in an emergency, you won’t be scrambling for answers. Make the contact names obvious like “ITALY – Police,” or “ITALY – US Embassy.”
I’ve been sick in foreign countries, and trust me—it’s not fun. But it would have been far worse if I had no clue where the hospital was or how to navigate the medical system. Knowing these details in advance makes any unfortunate situation easier to manage.
Tip: Download Google Maps Offline
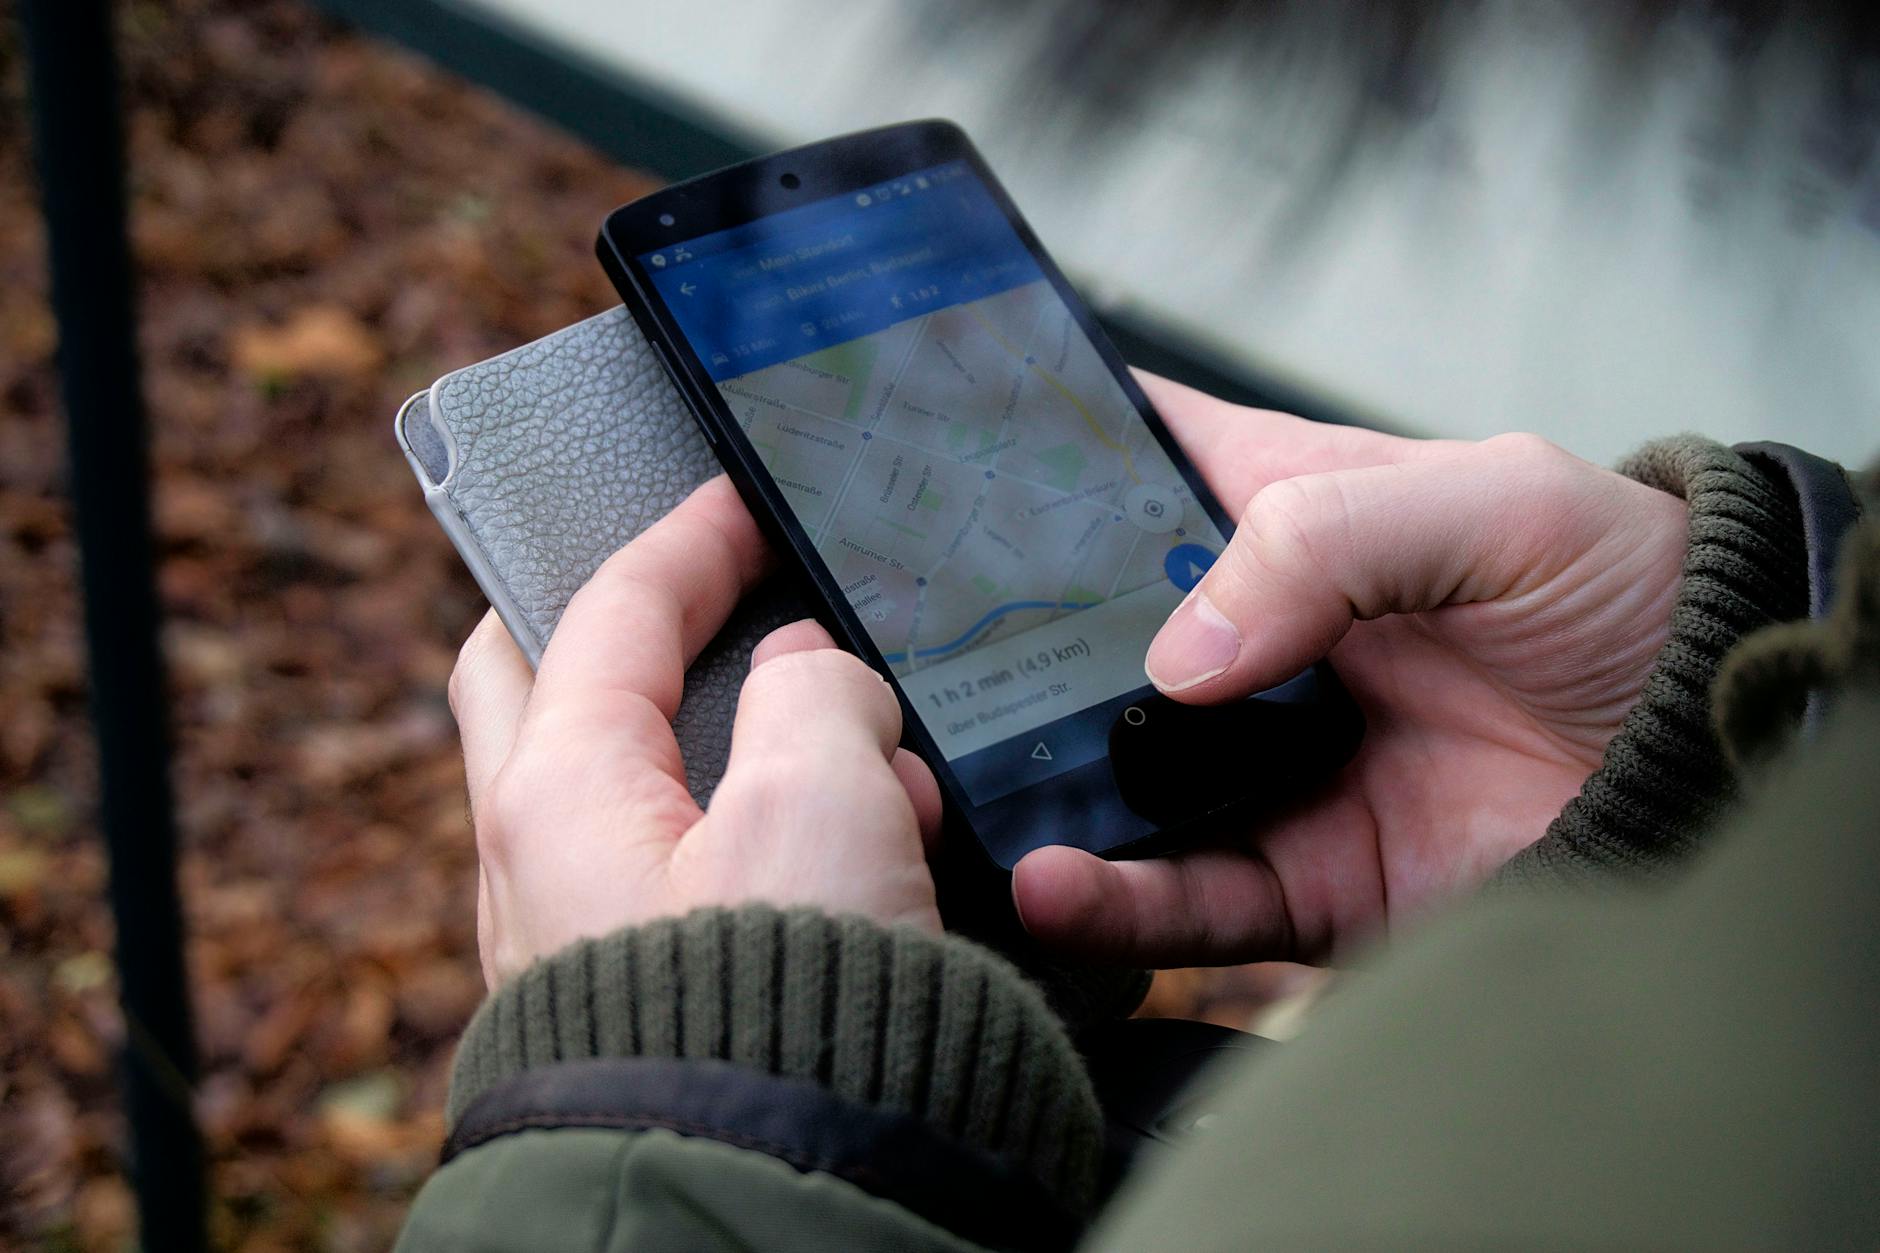
This is the first thing I do before entering a new country. Google Maps is one of the most reliable navigation tools worldwide, and downloading a city’s data ensures you can access maps even without service (takes <1 min, tutorial here).
I always pin my accommodation, and it has saved me countless times—whether it’s giving a taxi driver my address in the mountains of Koh Samui or remembering which narrow cobblestone street my hostel is on in Rome. Not relying on mobile service is a game-changer.
Tip: Share Your Itinerary with Someone You Trust
I started doing this to ease my parents’ worries, but now it’s an essential part of my travel organization. I use Google Sheets to create a detailed itinerary, including:
- Locations & addresses
- Dates of stay and travel
- Emergency contacts & local numbers
- Booking confirmations
Here is an example of one of these itineraries I made for a solo backpacking trip in Western Europe. I went a little overboard, including info about the hostel conditions and activities, but it honestly made me feel much better about being solo and prepared for everything.

I also share my live location with family and close friends, which has been a lifesaver more than once.
Tip: Backup Plans, Backup Plans, Backup Plans!

A philosophy my dad drilled into me: always have backups. Here’s what that looks like for me:
- Photocopies of your passport in different locations
- I’d always keep my passport in a pouch with an AirTag in my hostel safe, but one form of ID is not enough. I’d keep a copy of my passport folded with me (or a passport card if you have), then hide another copy in another place of my backpack.
- A separate wallet (one for daily use, one hidden with backup cards and an AirTag)
- Thankfully most places take contactless pay these days, so there’s no reason to keep your whole wallet on you. I usually keep one ATM card and one credit card at the most, and leave the rest of your cards and cash in a second wallet with an AirTag in it back at the hostel. I can tell you from personal experience that wallets get snatched and you want to make sure you have at least one useable credit card if this happens.
- Emergency cash in USD and local currency, stored in different places
- I always keep USD and local cash in my secondary wallet and another place in my backpack, hidden, but on the off chance I do get pickpocketed (hey, it couldn’t possibly happen 3 times in one year, right?!) I have cash to go grab. This has happened to me and the 50 euros I kept hidden literally saved my life. So do it.
- AirTags in key belongings (backpack, passport pouch, second wallet)
- A backup phone with a recent iCloud backup
- If you have an old iPhone that still works, bring it along as a backup. Before your trip, set it up with your most recent backup so it functions on WiFi. Speaking from experience (Barcelona, I’m still recovering), having a spare phone can be a lifesaver. While replacing a phone at an Apple store is usually straightforward, dealing with your provider and switching service can be a logistical headache. With a backup phone, you can at least connect to WiFi, message home, and access important accounts without the added stress.
Other Quick Safety Tips:

- Find a balance between being open-minded and staying cautious. Some of the best friends I’ve made while traveling came from striking up conversations at hostel bars or bonding on walking tours. But while it’s important to be social and embrace new experiences, it’s just as crucial to stay smart and take precautions with new people. The key is not to let fear hold you back from making connections, but also not to be so trusting that you put yourself in risky situations. It may take some practice, but once you’re mindful of both sides, finding that balance becomes second nature.
- Stay aware and don’t be reckless—this applies whether you’re in Bangkok or New York City.
- Avoid logging into banks or secure sites on public WiFi—use a VPN or cellular data.
- Carry a small first aid kit—one in your day bag and another at your accommodation.
- Be smart about transportation—use busy public transport, licensed taxis, and avoid unmarked vehicles or randos at the airport offering you cheaper rates.
- Trust your instincts—if a situation feels off, it probably is.
There are so many lessons you can only learn by doing, but these are the essentials I follow to feel safer and enjoy my travels to the fullest. I want to re-emphasize that taking these precautions doesn’t take the adventure out of solo travel, for me it does the opposite – allows me to be more comfortable saying yes to the most insane experiences!

Leave a comment